


If you thought the only way you could use your Mac to communicate with other people was to send email messages, you were wrong. For years the Mac OS has supported instant messaging, a form of texting similar to sending and receiving messages with a mobile phone.
In days past this was done with an application called iChat. iChat was significantly reworked, renamed Messages to reflect its relationship with the iOS app of the same name, and released in finalized form with Mountain Lion. Messages supports a number of services including AIM, Yahoo Messenger, Google Talk, and Jabber in addition to Apple’s own FaceTime video messaging and iMessage services. (iMessage is a scheme that allows you to send messages, documents, photos, videos, contacts, and group messages over Wi-Fi and cellular connections to iOS devices running iOS 5 or later and Macs running Mountain Lion. Unlike the SMS services offered by mobile phone carriers, it’s free.)
Messages is relatively easy to use, but it has a certain depth. In this lesson we’ll focus on its interface and basics.
Ready from the get-go
If you’ve added an iCloud account to your Mac, Messages is ready for you to use. Unlike with other kinds of accounts—Google or Yahoo, for example—you don’t have to choose to enable messaging in the Mail, Contacts & Calendars system preference. Your iCloud account is automatically added to Messages. Before we talk about the other kinds of accounts you can add, let’s focus on Messages with an iCloud account.
Launch Messages, and you’ll see a single Messages window. The left side of the window (which currently has nothing in it) will eventually display the names of any people you’re conversing with (even if the last communique was sent days ago). Along the top you find a Search field, which you use to look for particular users in the list below as well as for words that appear in one or more of your chats. Next to the Search field is a New Message button that, when clicked, creates a new conversation.
The right side of the window shows a To field, a Plus (+) button, and an area for displaying messages. Much as with Mail, if someone is in your list of contacts (as entered in the Contacts application) and has an email address or phone number registered with Messages (this would automatically be anyone with an iCloud account as well as email addresses and iPhone phone numbers manually added by that person), you can simply start typing their name and select the name you want from the resulting list. If you’d prefer to add a contact from a list of your contacts, click the Plus button to reveal that list.
Sending and receiving messages
At the bottom of the window is the message field where you enter your message. Once your missive is complete, just press the Return key on your Mac’s keyboard to send it. Unlike with SMS messaging or Twitter tweets, you needn’t worry about the length of your message, as there’s no character limit. Note, however, that the Messages window isn’t the best way to view lengthy screeds where a lot of scrolling is required. For that kind of thing, stick with email.
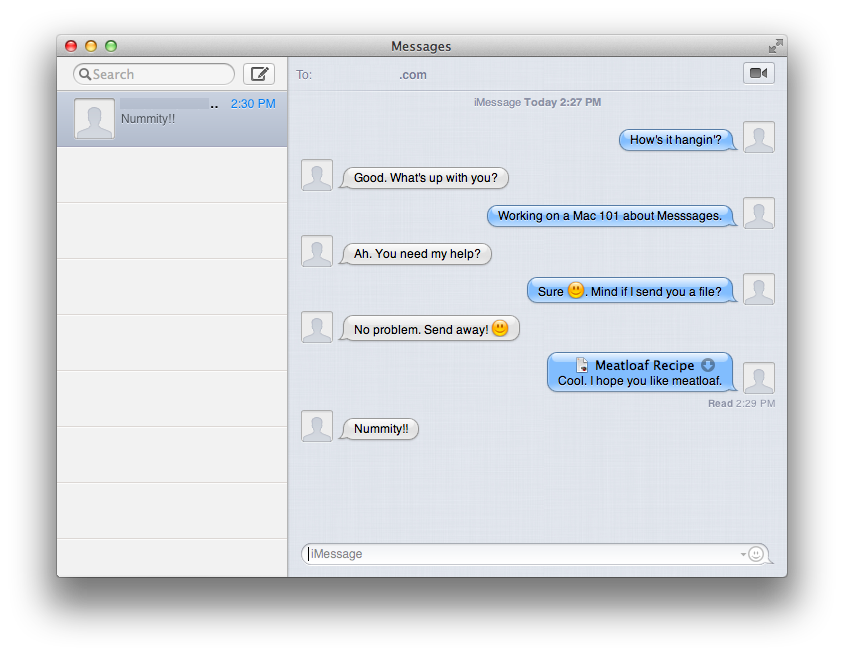
Messages you send will appear on the right side of the window in a colored bubble (blue by default, but you can change it within Messages’ preferences). When a message has been successfully sent, the word “Delivered” will appear below the message.
Any message you receive will appear on the left side of the window in a white bubble, and the sender’s name or phone number (depending on the device that sent it) will appear in the left column. To reply to the message, just make sure the sender is highlighted on the left; then type your answer into the message field, and press Return. As you start to reply, the person you’re chatting with will see a bubble that contains an ellipsis, telling them that you’re working on your reply.
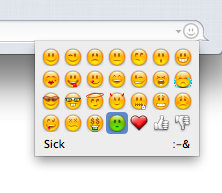
You can use this message field to send more than text. For example, if you’d like to add a little personality to your message just click on the smiley face on the right side of the field and choose an appropriate icon. (You can also type in a standard emoticon such as ;) or :\ and it will be transformed into a richer image.)
You can also transfer files to the other person by dragging them into the message field. If you receive an image, that image will appear as a thumbnail within the Messages window. To retrieve it, just drag it to the desktop. Other attached files will display a small icon, their name, and a downward-pointing arrow icon. Click on that icon, and the file will be placed in your account’s Downloads folder. You can also access files by choosing Windows > File Transfers. These include files you’ve received as well as sent.
Using other accounts
As I mentioned, Messages isn’t restricted to just iCloud accounts. It also supports AIM, Yahoo Messenger, Google Talk, and Jabber. If you use the Mail, Contacts & Calendar system preference to add an AOL, Yahoo, or Google account, you’ll have the option to enable messaging for each of these accounts. When you do, they’ll appear within Messages’ Accounts preference and you’ll be able to use Messages to send and receive messages through these services. If you have an AIM account (which is AOL’s service designed specifically for messaging) you’ll have to add that account within Messages’ Accounts setting—it can’t be set up in Mail, Contacts & Calendars. Likewise, you must set up Jabber accounts within this same Messages preference.
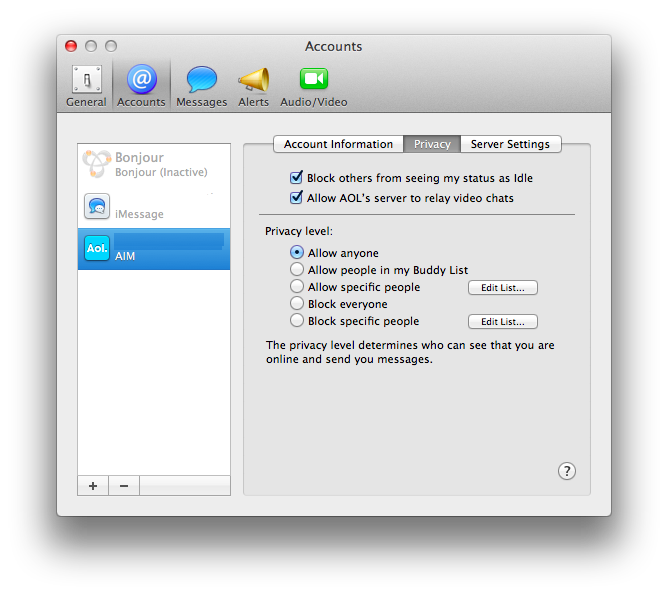
Fortunately, it’s easy to do. Just choose Messages > Preferences, selectAccounts, click the Plus (+) button at the bottom of the window, and in the sheet that appears choose AIM or Jabber from the Account Type pop-up menu. Now enter your user name and password and click Done. Messages will verify and add the account. Which options appear for each kind of account vary depending on the account. For example, with an AIM account you can play with privacy settings. If you have an iCloud account you can choose which addresses and phone numbers others can use to reach you. With a Google Talk account you can enter a nickname.
Aha, I see you’ve spotted one other account you might not have known was there:Bonjour. Bonjour is an Apple technology that allows Macs, iOS devices, and supported peripherals to “see” each other on a local network without you having to configure anything. In this instance, when two Macs in your home are connected to the same network and you’ve enabled Messages’ Bonjour accounts on each one, you can use Messages to chat between the two.
If you’ve configured any additional accounts (and this includes Bonjour), you’ll findBuddies listed in Messages’ Window menu. Select it and a Buddies list appears, which includes any contacts you’ve added in enabled accounts. If you have multiple accounts—AIM, Google Talk, and Bonjour—you’ll see a separate heading for each type of account. Click the triangle next to each one and a list of contacts connected to that account appears.
Simple as it sounds, this is confounding for those who used iChat in the past. “Where’s my Buddies list!?” those with iCloud-only setups cry. And now you know. If you have only iCloud configured, you use your account’s contacts. For everything else, it’s buddies.
Regardless of which kind of account you use, you can always communicate your status to others. You can do this within the Messages window by clicking on the status pop-up menu in the bottom-left corner. You can choose Offline, Invisible (which hides you from other people), one of the green status messages that indicates you’ve available, or one of the red status messages that tells the world you’re either not around or don’t want to be bothered. You can additionally choose Edit Status Menu and configure a custom message. You’ll find this same pop-up menu at the top of a buddies list.
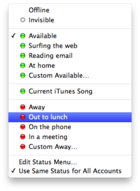
Note: It’s perfectly okay to use the status message to lie. It’s no one’s business if you really are or aren’t away. If you don’t feel chatty or you have other things to do, just choose Awayand ignore those people who attempt to chat with you. (Or chat with those who understand that your Away message really means “I’m away except to my very closest pals.”)
Video chats
Audio and video chats can also be confusing. If you’re holding a chat over your iCloud account, you’ll see a camera icon in the top right corner of the Messages window. Click on it and the FaceTime application launches. It’s within FaceTime that you conduct your chat. (We’ll talk about the ins and outs of FaceTime in a future lesson.)
If you’d like to conduct a video chat using a different service, you use Messages’ built-in video chatting feature. But that works only if all participants are using the same service. So, if you want to video chat over an AIM connection, everyone in the chat must be using an AIM account. The same goes for Google Talk or Yahoo. You can’t video chat across services. Think of it as everyone having to be tuned to the same channel.
To video chat within Messages, you must enable the option. You do that by selecting Video > Video Chat Enabled. (If your hair is a mess and you’d prefer to chat audibly only—or your Mac has a microphone but not a camera—select Audio Chat Enabled.) When the person on the other end does the same, just click on the camera icon next to their name in the Buddies list to initiate the chat. They must accept your invitation by clicking on a dialog box that appears on their screen. Once they do, the video chat begins.
If you’d like to chat with more than one person (Messages supports video chatting with up to three other people), hold down the Command key and click on the people you wish to chat with. Then click the camera icon next to one of the selected individuals.
Before beginning your chat you can see how you’ll look on camera. To do that, choose Video > Video Preview. A window appears that shows you the output from your connected camera. (This can be the Mac’s built-in camera or a compatible camera connected via USB or FireWire.) Click Preferences in this window, and Messages’ Audio/Video preferences appear, where you can choose which microphone and camera to use (if your Mac is connected to more than one).

Before you close the preview window, choose Video > Show Video Effects. Like other Apple applications that use the camera, Messages can take advantage of OS X’s built-in video effects. Just about every one of them is not appropriate for a business conversation, but for pure goofing around, they’re a hoot. (And, in the case of many of the distortion effects found on the third page, you can click in the preview window and drag the effect to a new position.)
