

Whether it’s to pay the bills, replace furnace filters, or take the ferret to the vet for its annual cleaning, we all need reminding from time to time. Yes, you can accomplish this through a calendar event and alarm, but a calendar is too broad a tool for this kind of thing. What you really need is the digital equivalent of a scrap of paper onto which you write notes and shove into a handy pocket. Such is exactly the purpose of Mountain Lion’s Reminders application.
This is another OS X application originally rooted in Apple’s iOS. And it differs very little from its iPhone, iPod touch, and iPad counterpart. Fire it up and here’s what you see.
The overview
Reminders is made up of two major areas by default. On the left side of the window you find any lists you’ve created. For instance, you might find Work and Home headings here. If you’ve configured your Mac with an iCloud account (or other services that support reminders including Yahoo, Exchange, and Hotmail, but not Google Tasks), you’ll see headings for those services, under which will be lists associated with them.
On the right side of the window are the reminders that are associated with the selected list. For example, if you’ve created a Home list, when you click it you’ll see the Take Out The Trash, Tune The Piano, and Eat More Leafy Green Vegetables reminders you’ve created for that list. If you’ve ticked off (and by this I mean “completed” rather than “angered”) any reminders in this list, you’ll spy a Completed entry at the top of this list (you may need to scroll up to reveal this entry).
You can make the list column disappear by clicking the Hide Sidebar button (Command-Option-S) at the bottom left of the window. And you can show or hide a monthly calendar by clicking the Calendar button (Command-Option-K).
The Reminders window bears two Plus (+) buttons. The one at the bottom of the list column is for creating a new list (Command-L). The button in the top right of the reminder pane is for creating new reminders (Command-N).
Creating and configuring reminders
As I just mentioned, you can create a new reminder by clicking the Plus (+) button in the reminders area or press Command-N. Additionally, you can simply click the first unoccupied line in a reminder list and a new reminder will appear, ready for you to enter the information you like.
As soon as you start typing, a small gray Info icon appears to the right of your reminder. Click it (or press Command-I) to configure the details of your reminder. Specifically, in the resulting window you can change the name of the reminder, choose when (and where) you’ll be reminded, assign a priority to the reminder, and add a note to it.
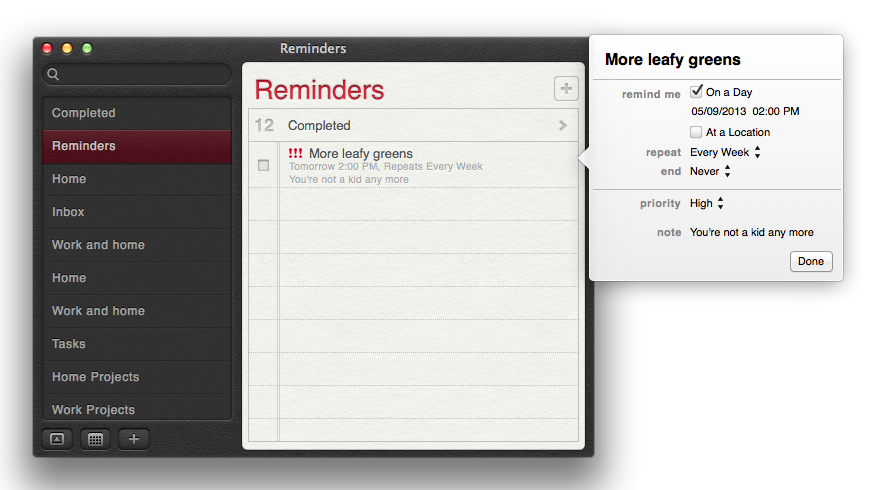
When you enable the On a Day option, date and time entries appear below. Click the date entry and you can choose a date from a monthly calendar. To move from month to month, use the left and right arrow buttons. To return to the current date, just click the dot that sits between the two arrows. You edit time as you normally would be changing the hour and minute fields and choosing AM or PM. Also, when you enable this option, a Repeat entry appears. Use this to repeat the reminder every day (Take Your Pills), every week (Attend Team Meeting), every two weeks (Suck Up To The Boss), every month (Pay Alimony), or every year (Arbor Day).
The At a Location entry may puzzle you, particularly if you’re using a desktop Mac rather than something more portable such as a MacBook Air. After all, what good does it do by telling your iMac that you’d like to be reminded to pick up Ferret Friskies when you’re within shouting distance of the Weasel Warehouse?
The location entry is all about syncing and your iPhone. One of the marvels of Apple’s phone is that it knows where it is, and it can use that knowledge to perform minor miracles. In this instance, it’s quite aware of where the Weasel Warehouse is and it’s more than happy—with a reminder in hand to instruct it to do so—to issue a gentle nudge when you’re close to this source of comestibles for the discerning mustelidae.
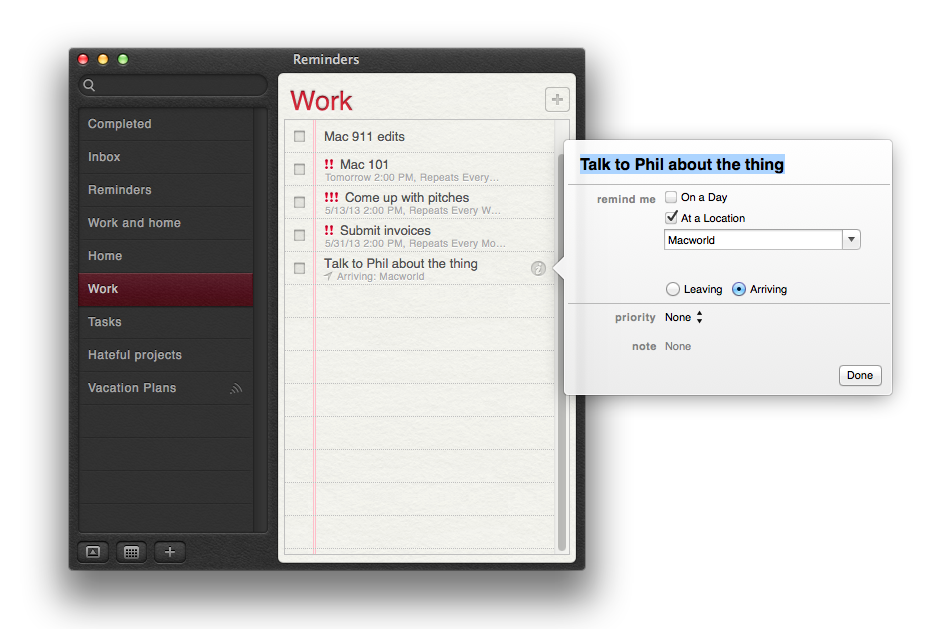
Better still is that you can configure these location reminders to go off either when you leave or arrive at a particular place. On the day’s list of things to do may be Cut Hair followed by Attend Soccer Game that are arranged that way because of how your day’s appointments fall. It makes little sense to wait to offer up an Attend Soccer Game reminder until you’re actually at the field. Far better to create that reminder so that it goes off when you leave Krazy Kuts.
Entering a location is simple. If you’ve created a contact that bears an address, just enter that contact’s name—Weasel Warehouse or Krazy Kuts, for example. Otherwise, type in a street address and tap Done.
While this feature is iPhone-centric, you may prefer to create these kinds of reminders on your Mac. Many of us find it easier to enter information with our computer’s keyboard and some people like to organize their lives on their Macs. Using the Reminders application is one way to do that.
There are four priorities you can assign to a reminder—none, low, medium, and high. When you assign a priority other than none to a reminder, exclamation marks appear next to the reminder (!, !!, and !!!, respectively). These priority marks appear on other devices synced with your reminders.
And the Note field is for exactly that. Click Done when you’ve finished configuring your reminder.
