

One of the most frequently asked questions posed to seasoned Photoshop pros is how to turn a photo into a pencil sketch.
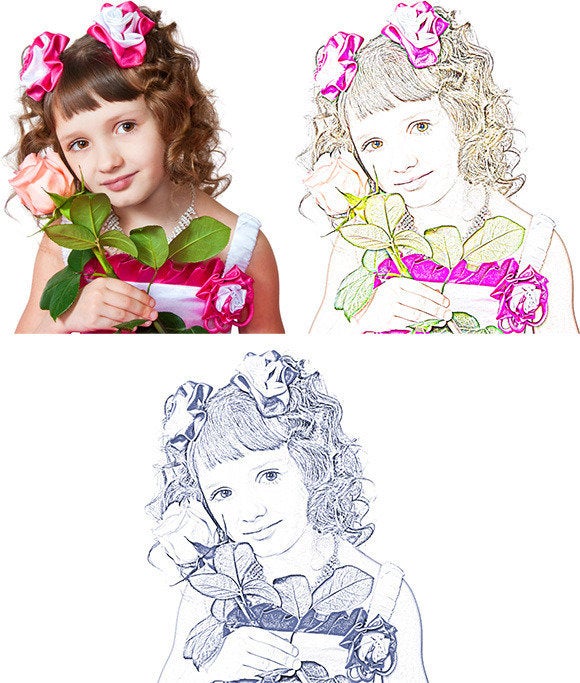
While there are many ways to get it done, this particular technique, which requires Photoshop CS5 or later, produces a remarkably realistic result and gives you lots of flexibility for colorization…without harming your original photo.
1. Layer up
This technique works best on subjects shot on a white or other light-colored background. Open a photo in Photoshop and if the soon-to-be-sketched image consists of a single layer, press Command-D to duplicate it. If the image consists ofmultiple layers—say, if you used adjustment layers to correct the image as shown here—you need to create a brand-new layer that contains the content of all the other layers.
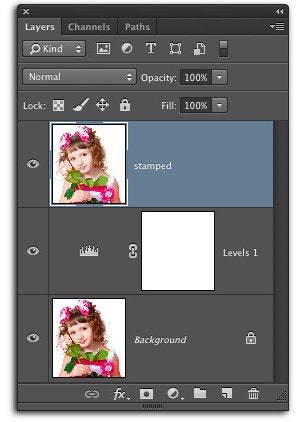
To do that, activate the topmost layer in your layer stack and from the Layers panel fly-out menu, press and hold the Option key and choose Merge Visible (the keyboard shortcut for this maneuver is Shift-Option-Command-E). Photoshop adds a new layer at the top of your layer stack that contains the content of all visible layers (those that have their visibility icons turned on). This process is called creating a “stamped copy” or “stamping visible layers.”
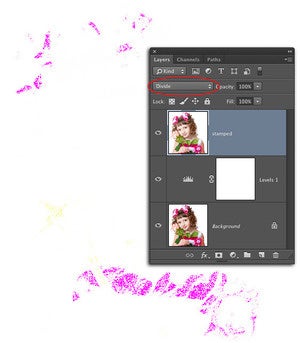
2. Divide and conquer
Using the menu near the top of the Layers panel, change the blend mode of the duplicate or stamped layer to Divide. This mode debuted in Photoshop CS5 and significantly brightens your image, nearly to the point of being solid white. Don’t panic, we’ll fix that in the next step.
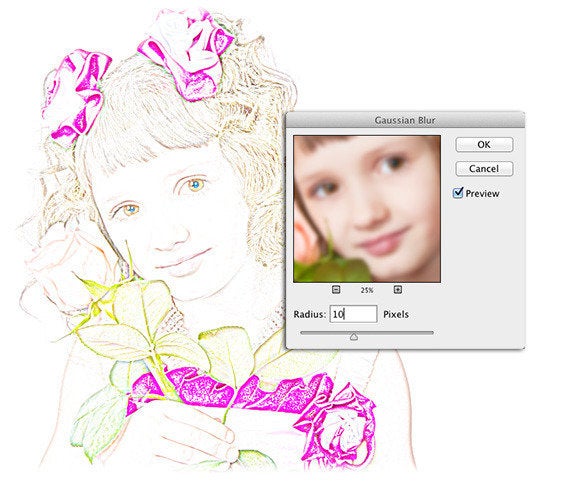
3. Gaussian Blur
Choose Filter > Blur > Gaussian Blur and in the resulting dialog box, enter a fairly small amount in the Radius field and then click OK. A value of 10 pixels was used on this 2500x2700 pixel image.
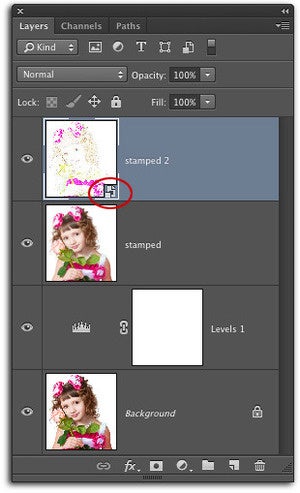
4. Smarten up
Create a stamped copy of your existing layers by activating the topmost layer and pressing Shift-Option-Command-E. Next, convert the newly stamped layer into a Smart Object by choosing Filter > Convert for Smart Filters. Notice the special badge that appears on the layer’s thumbnail (circled here).
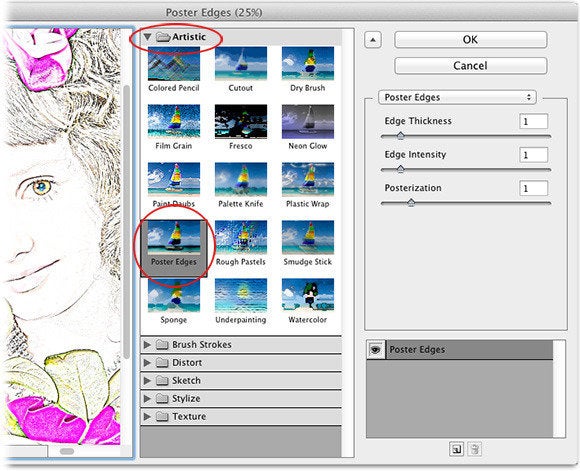
5. Fun with filters
To accentuate the high-contrast edges in the photo, we’ll use the Poster Edges filter. In CS6 or later, choose Filter > Filter Gallery, locate the Artistic category and single-click the Poster Edges icon (in CS5, choose Filter > Artistic > Poster Edges). Either way, enter a value of 1 for each slider and then slowly drag each slider rightward until you produce a pleasing result (each image is different so this part requires experimentation). Click OK when you’re finished.
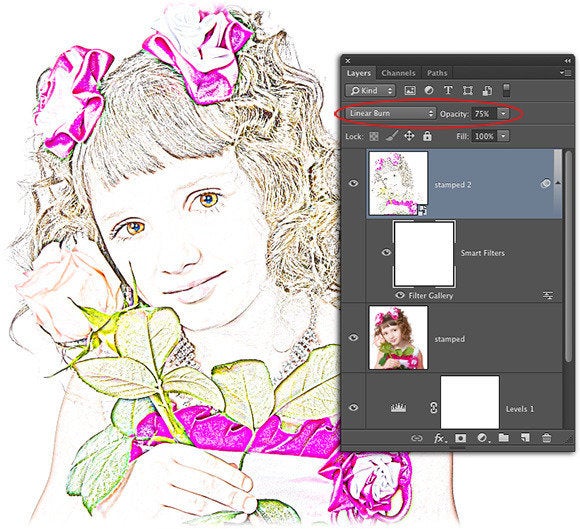
6. Burn in some contrast
Change the blend mode of the Smart Object you created in step 4 to Linear Burn. This darkens colors and adds a splash of contrast. If the effect looks too harsh, lower the Opacity setting at upper-right of the Layers panel—a value of 75% was used here. If you don’t want to colorize the sketch, you can skip ahead to step 8; but if you do, keep reading!
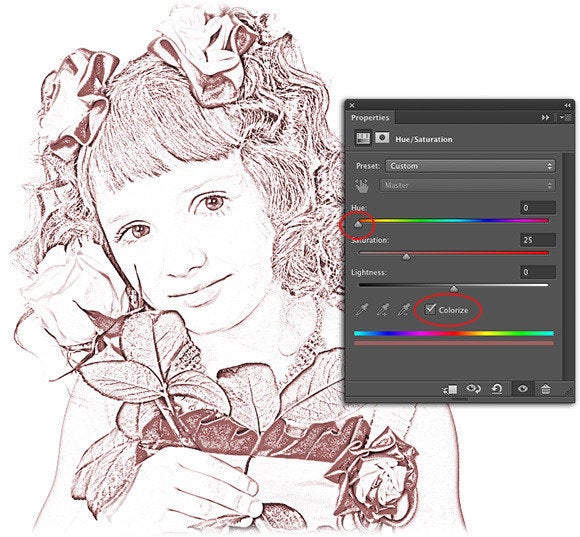
7. Colored pencils
To create a solid-colored sketch and/or adjust the saturation of the colors in your sketch, reach for a Hue/Saturation adjustment layer. Choose Layer > New Adjustment Layer > Hue/Saturation and click OK in the resulting dialog box. In the Properties panel that opens (it’s named the Adjustments panel in CS5), turn on the Colorize checkbox near the bottom of the panel to create a solid colored sketch. Experiment with the Hue slider to find a pleasing color. If you just want to reduce the saturation of your sketch, leave the Colorize checkbox turned off and drag the Saturation slider slightly leftward.
8. Ta-da!
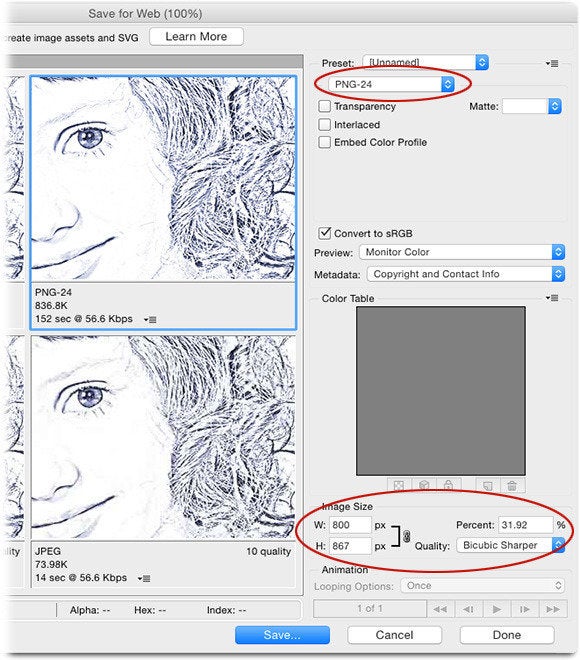
Save your masterpiece by choosing File > Save As and choosing Photoshop from the Format menu. This maneuver preserves your layers for future editing (say, if you want to change colors later on). If you want to email or post your sketch online, create another copy by choosing File > Save for Web. For the highest quality, choose PNG–24 from the file format menu at upper-right and then turn off the Transparency checkbox. If your photo is big, reduce its size by entering a new width (or height) into the image size fields at lower right. Choose Bicubic Sharper from the Quality menu and then click Save.
As you can see, this technique takes a little time, but the results are well worth it. Until next time, may the creative force be with you all.
