Here’s what you need to know about Apple’s suite of wireless sync and backup services.
What is iCloud?
Over the past few years, consumers have become obsessed with the notion of having their documents and data instantly available wherever they are, on whichever device they happen to be using at the time. In the past, Apple experimented with this by offering limited sync services; with iCloud, the company is charging head-first into the digital-sync sphere.
In short, iCloud is a catchall phrase that covers Apple’s entire suite of wireless sync and backup services, which aim to keep your devices—both iOS, and desktop computers running OS X Lion, Windows Vista, or Windows 7—on the same page, no matter which one you’re using at any given moment. Broken down, those services cover four areas: document and data sync, mobile backup, location awareness, and purchase management.
Any customer can create a free iCloud account, which provides 5GB of storage for document sync and mobile backup; additional space can be purchased for a yearly fee. (Your purchased content from the iTunes and App Stores do not count toward this storage limit.) Unlike certain third-party services, iCloud isn’t focused on preserving your individual files, or providing a central folder where you can upload documents to access across platforms—Apple wants you to stop worrying about where specific files save to, and instead focus on the information itself.
Document and data sync: This portion of iCloud provides you with an invisible online repository (5GB for free, up to 50GB on a yearly paid plan) for your email, contacts, calendars, documents, and app data. Your iOS devices and computers collectively sync to and pull information from this central server on a regular basis, thus keeping everything up-to-date. Like iCloud’s predecessor, MobileMe, your mail, calendar, and contact accounts will be accessible from all your devices and on the Web. You’ll also be able to access your iWork documents, if you have one of the iWork apps on your iOS device.
Mobile backup: If you’ve owned an iOS device before, you’ll find iCloud backups very similar to tethered iTunes backups. Like iTunes, iCloud backs up information on your purchased content (music, apps, and books), your Camera Roll, device settings, data, home screens, messages, and ringtones, but instead of saving that information in a file on your computer, the service stores it online instead. Your purchases themselves aren’t backed up to your iCloud account; instead, your backup keeps a record of what you own. When you restore your device from a backup, those purchases automatically redownload back in place, aided by your backed-up app data and home screen positioning. This way, you should always be able to restore information without ever needing to plug your device into your Mac or PC.
Location awareness: As part of iCloud, you can locate both your devices (iOS and Mac) and your companions, using the Find My iPhone and Find My Friends app, respectively. Both apps are free and available to download from the App Store; you can also locate your iOS device and your Mac by going to the iCloud website.
Purchase management: The final part of Apple’s iCloud strategy focuses on your past purchases and your iTunes media collection. Using your free iCloud account, you can access a complete record of all your purchased iTunes content; choose to download new music, apps, and books automatically; and redownload anything for free. Pay a yearly fee, and you can access your entire music library (up to 25,000 songs) across multiple devices, whether they be purchased iTunes songs or not.
Set up iCloud
If you don’t have an iCloud account, it’s easy to sign up for one, either on your device, when updating to iOS 5 or through the Settings app, or on your computer if you’re running OS X 10.7.2. If you’re switching from MobileMe, you have to move and merge your account through the iCloud website before you can take advantage the service.
Do you have an Apple ID? If you’ve ever purchased something from the iTunes Store, you’ll have signed up for an Apple ID (which is usually your primary email address). Even if you never used this account to sign up for MobileMe, you can convert it into an iCloud account.

If you’ve converted your old Apple ID, you need to toggle the Mail switch to On in the iCloud pane to get an email address for your account.
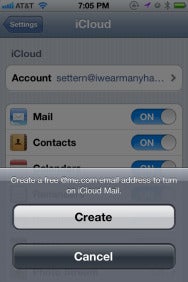
To do so from an iOS device, go to the Settings app and tap the iCloud menu. At the top of the screen, enter your Apple ID and password. After a moment of setup time, iCloud will prompt you to merge anything on your device with this newly created account; tap Merge to do so, or Don’t Merge if you don’t want to copy the information currently on your device. From there, just tap the toggles to customize your iCloud account the way you prefer. Note that if you convert an Apple ID into an iCloud account, you won’t have access to iCloud email by default—you’ll have to create a name@me.com address first. To do so, toggle the Mail slider in the iCloud settings pane to On; a pop-up dialog box from the bottom of the screen will prompt you to create a username.
To activate iCloud on your computer, you need to be running OS X 10.7.2. (You can download it from Apple’s website or from Software Update on your computer.) You can set up iCloud online at icloud.com by simply logging in with your Apple ID; you can also set it up from your computer’s System Preferences application by clicking on the iCloud preference pane.
But what if I share my Apple ID? If multiple people use your Apple ID (say, if you have one central account for your, your spouse’s, and your children’s purchases), you can still use this ID among you for purchases, but each person will have to create a separate iCloud account for syncing and backup.
For example, if you have an Apple ID (or MobileMe account) you use between you, your significant other, and your daughter for purchases, but they'd like to take advantage of iCloud's sync and storage features, you'll want to do the following: Have each family member sign up for an iCloud account for their backups, mail, etc; then, after setting up iCloud on their iOS devices, go to the Store preference pane within the Settings app, sign out of the iCloud account (which will populate there automatically after you sign up), then sign into the original Apple ID you use for purchases.
If the Apple ID your family uses for purchases is also your primary account for syncing (if it's a MobileMe account, for example), you personally can use it for iCloud; but your family members will need to create separate iCloud accounts so that they don't accidentally end up syncing with your information.
Can I merge Apple IDs into one iCloud account? Not at this time, unfortunately.
How do I merge my MobileMe account? If you have a MobileMe account you’d like to move to iCloud, make sure you know what you’re potentially getting rid of before you do anything. While iCloud shares many of MobileMe’s features, it’s axed a few others: namely, iWeb publishing; Gallery; iDisk; and OS X syncing of Dashboard widgets, keychains, Dock items, and System Preferences. If you choose to move over your account, make sure you read Apple’s FAQ on the matter to ensure you’re not accidentally deleting data you haven’t backed up.

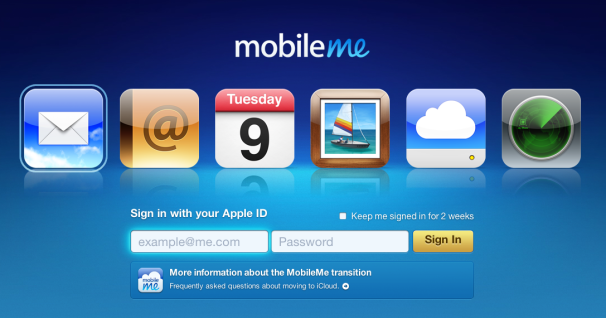
To convert your MobileMe account into an iCloud account, visit the MobileMe Move page and enter your account information.
If you’re certain you’re ready, you can move your account by going to me.com/move on a computer running OS X 10.7.2 and following the steps. Once you complete the conversion, you can use your MobileMe credentials to sign into iCloud on your iOS device and computer.
Sign Up for iCloud: If you’ve never purchased music, or if you need to create a new Apple ID, you can very easily create one directly from your iOS device or computer.
If you’re on an iOS device running iOS 5, head to the Settings app and tap the iCloud menu. At the top of the screen, you’re prompted for a username and password if you already have an account; otherwise, you can tap Get A Free Apple ID at the bottom to sign up for one. If you’re on a computer, you can sign up for an iCloud account online at icloud.com, or from the iCloud pane in the System Preferences app.
Storage in the cloud
As mentioned above, iCloud provides you with 5GB of space for free in which you can store device backups, email, contacts, calendars, documents, and app data. While your purchased content—apps, music, books, and shows—and your Photo Stream is part of iCloud, it doesn’t count toward that storage limit: Apple takes care of all of that for you.
For most people, 5GB should be enough, at least initially. But once iCloud document storage becomes more prevalent, that may change. For those who want more space, Apple has several paid plans available that range from $20 to $100 a year.
For $20, you can add another 10GB of storage (for a total of 15GB); for $40, you can bring that total up to 25GB total storage; and for $100, you can have a grand total of 55GB of iCloud storage in your name. Buying these plans is as simple as visiting the iCloud preference pane on your iOS device or computer: On an iOS device, head to Settings -> iCloud -> Storage & Backup -> Buy More Storage; on your Mac, open the iCloud pane in the System Preferences application and click the Manage button next to the bar showing your iCloud storage. From there, it’s just like purchasing an iOS app or something from the Mac App Store, as you sign into the Apple ID and password associated with iCloud.


